Canva is a free, online design software. It uses a drag-and-drop format and provides access to over a million photographs, graphics, and fonts. It is used by non-designers as well as professionals. The tools can be used for both web and print media design and graphics.
With a few simple clicks, you can design and create gorgeous, professional labels from Canva’s pre-designed fonts, images, icons and layouts.
On this page, we will walk you through the steps for creating labels in Canva.
INSTRUCTIONS
1. Before designing
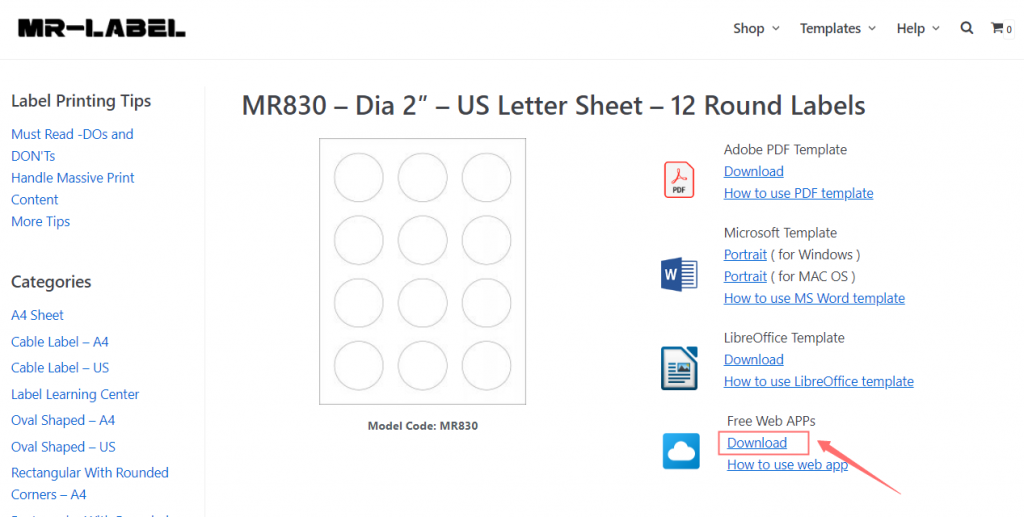
- Download the JPG version of your labels from Mr-Label template center (https://mr-label.com/articles/category/templates).
- Open Canva and create a free account at https://www.canva.com/
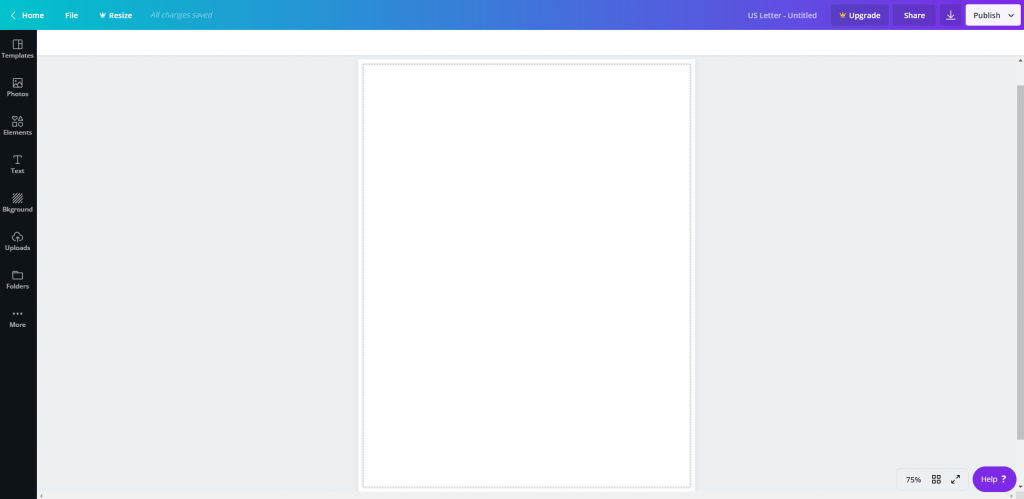
- Choose “US Letter Document“, “A4 Document” or “Custom Dimensions” to work in landscape.
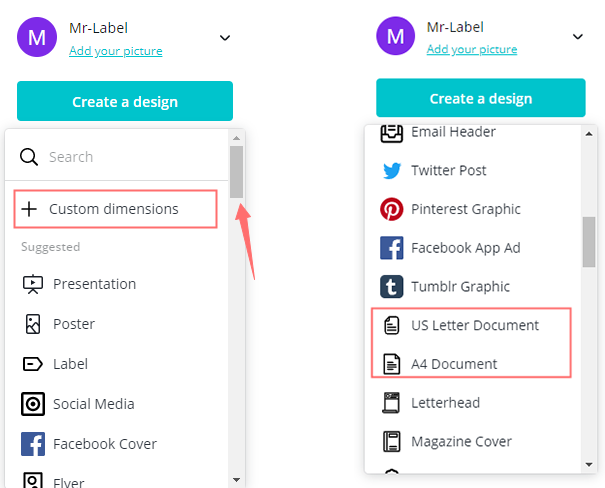
- Once you are on the US Letter Document or A4 Document page, you will see Figure 5 as I do, and now need to upload our JPG label background to the Canva page. Using the instructions below.
2. Creating Your Labels in Canva
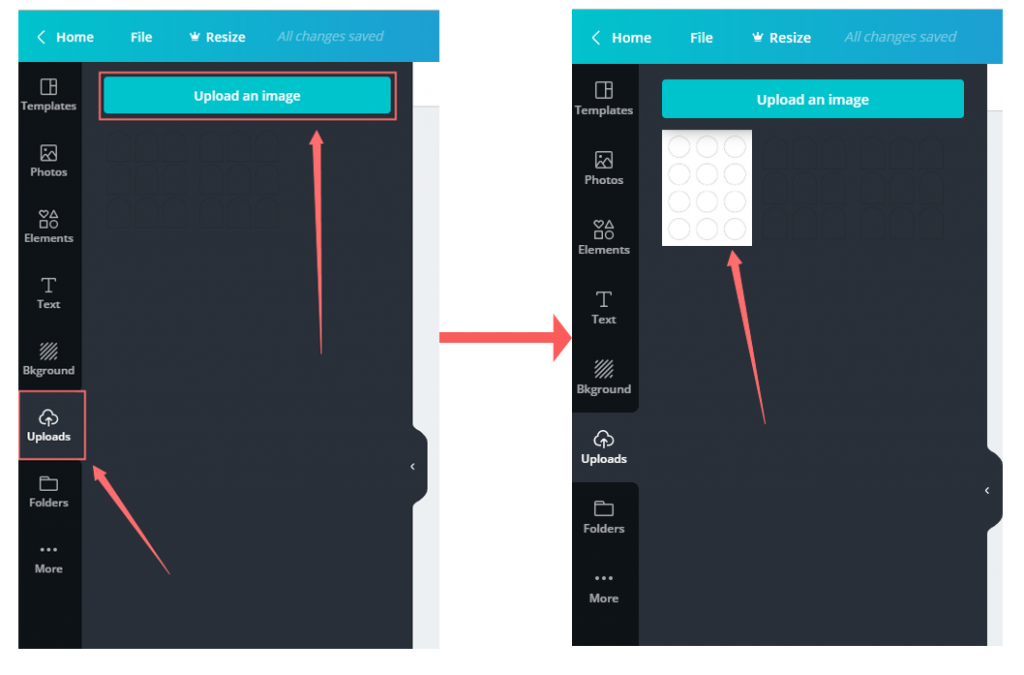
- Go to the Uploads tab.
- Upload your own images by selecting the JPG you downloaded from Mr-Label template center.
- The image will now appear as a usable element in your uploads section.
- Optional: You can also upload any images that you want to add to your label or hangtag, and they will stay here to use.
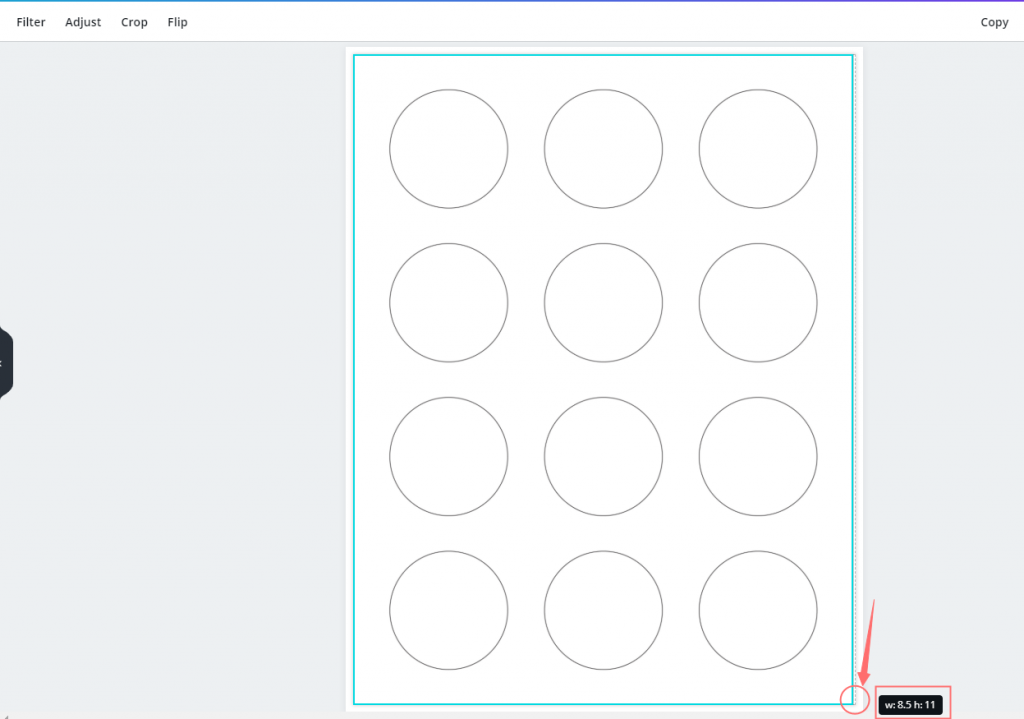
- Click this image and then it will be shown in the page.
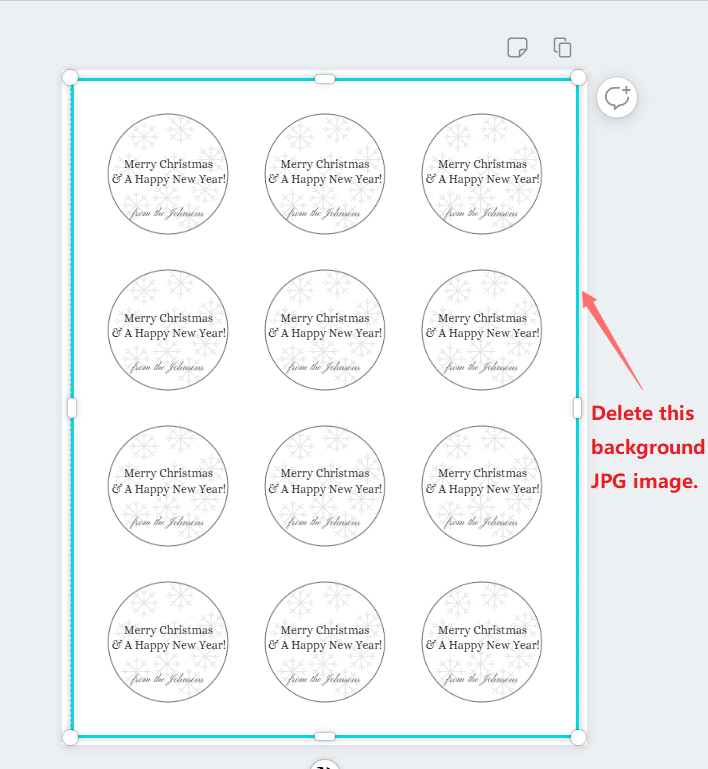
- Click on the bottom right corner of the image to Stretch the JPG background to fill the space of the document. When stretching, you can see the size information in the lower right corner. (Don’t forget to delete the background before printing!)
- Design away! Use Canva’s extensive photos, fonts, icons and elements to design your own labels. Just drag, drop and customize. I will give an example as below to make it clear to you.
Example
Here I’m using MR830 to design a Merry Charismas Greeting Label.
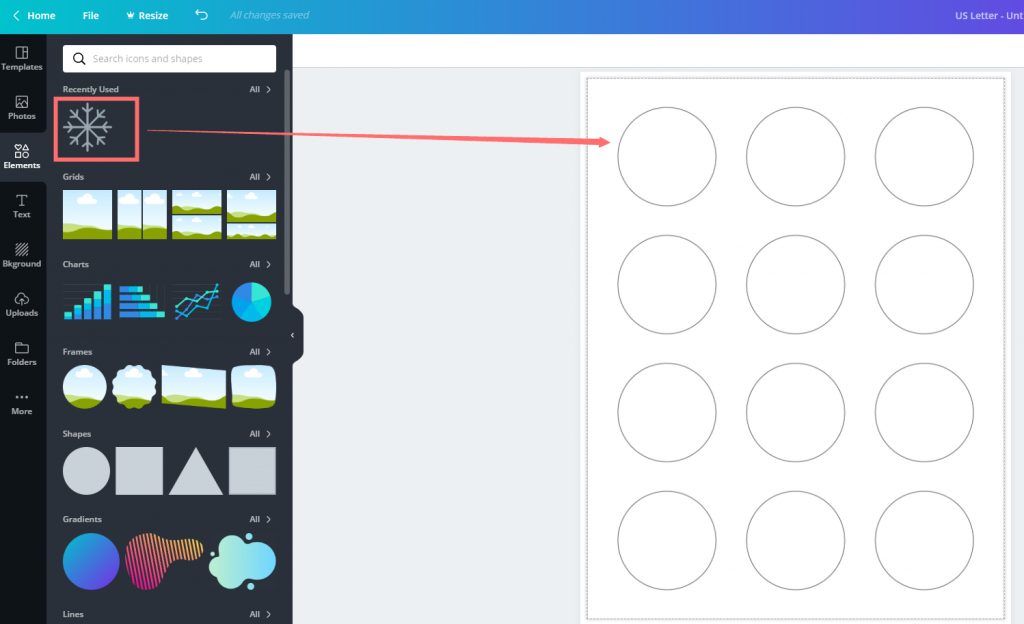
1). Choose Elements and select Snowflake as our labels’ background. Drag this Snowflake element to the page and resize it by clicking on the bottom right corner of this image.
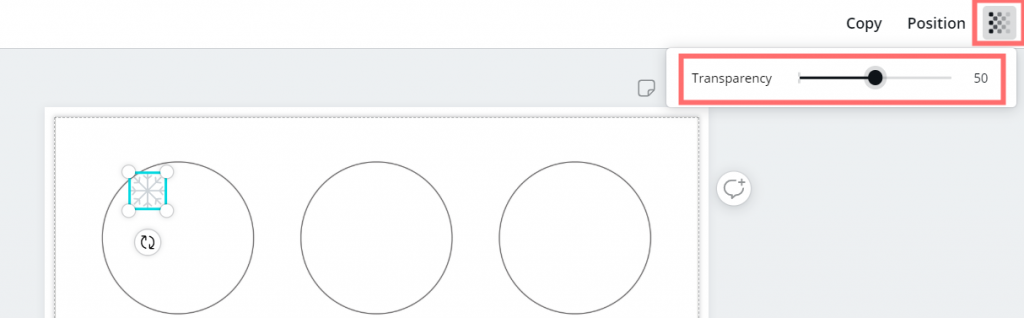
2). Adjust the transparency of this snowflake to 50%.
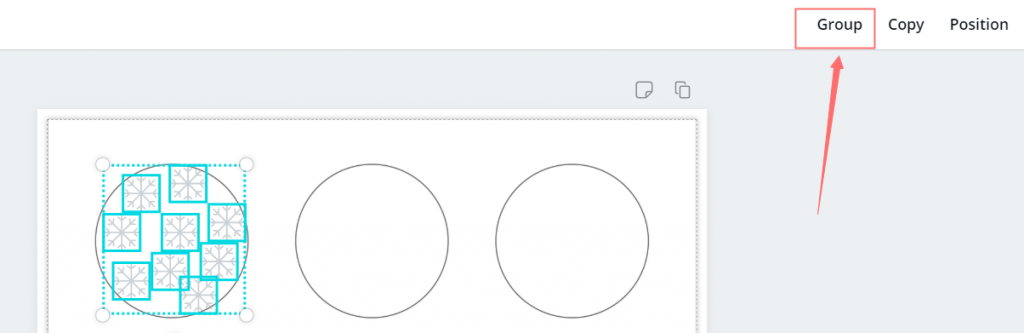
3). Hold down the “Alt” button, then drag the snowflake with the left mouse button to copy the pattern. Copy a few more to make it fill irregularly into this circle label.
4). Hold down the “Shift” button, then click on the snowflakes to select them all. Click “Group” to combine these snowflakes into a complete layer.
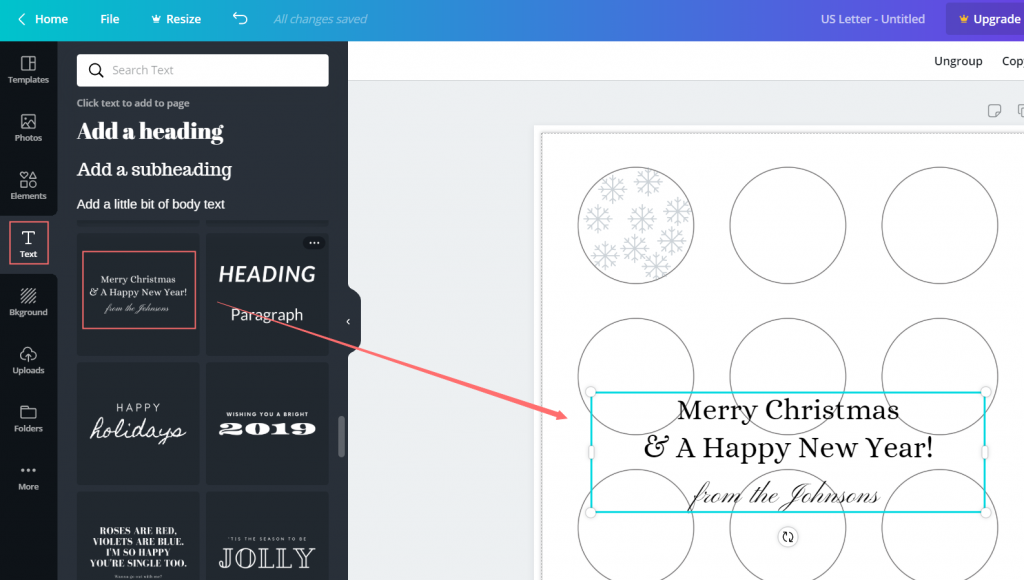
5). Select a Christmas greeting from the Text and drag it to the page, adjust to the appropriate size. So the first label is designed.

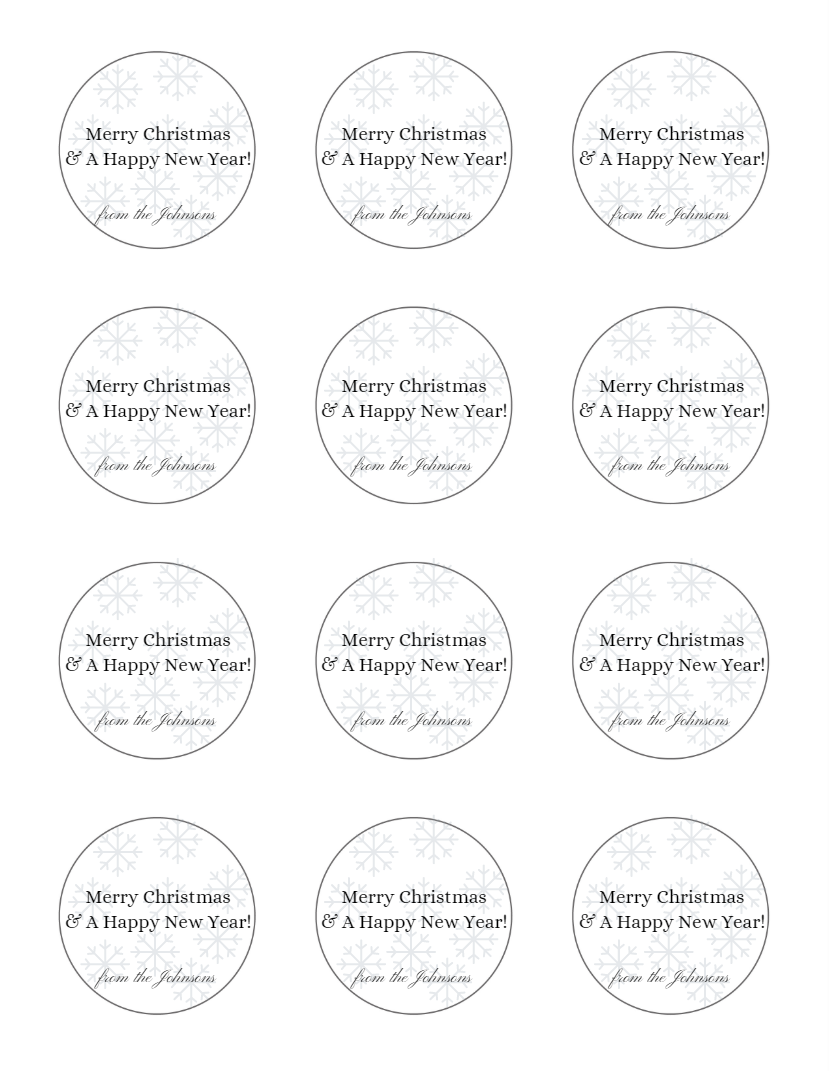
6). If all your labels contents are the same, you can select the content inside the first label (including text and images), then copy them to the remaining labels.
7). If your labels contents are stored in a spread sheet, you need to design them one by one.
3. Finished and print!
- Once finished, delete the background JPG, so the outlines do not print on your labels.
- Download your design by clicking this icon.
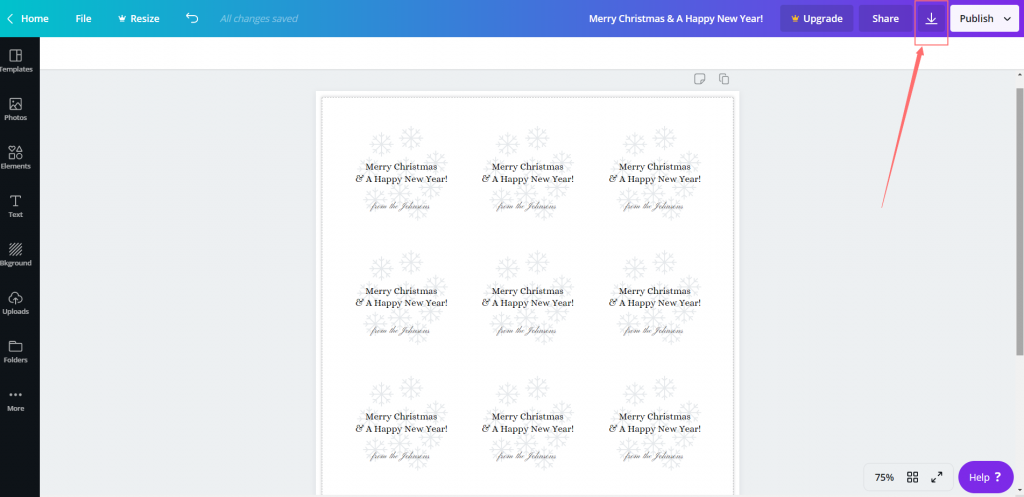
As always, print a test page before printing directly on your labels.
I think other web site proprietors should take this site as an model, very clean and magnificent user friendly style and design, let alone the content. You are an expert in this topic!