How to use blank Canva template – Click and check the instruction video
How to use pre-design Canva template – Click and check the instruction video
How to bulk edit/replace text in pre-design template – Click and check the instruction video
1. How does our Canva templates constructed?
Here we divide all the layers into 3 types for instruction.
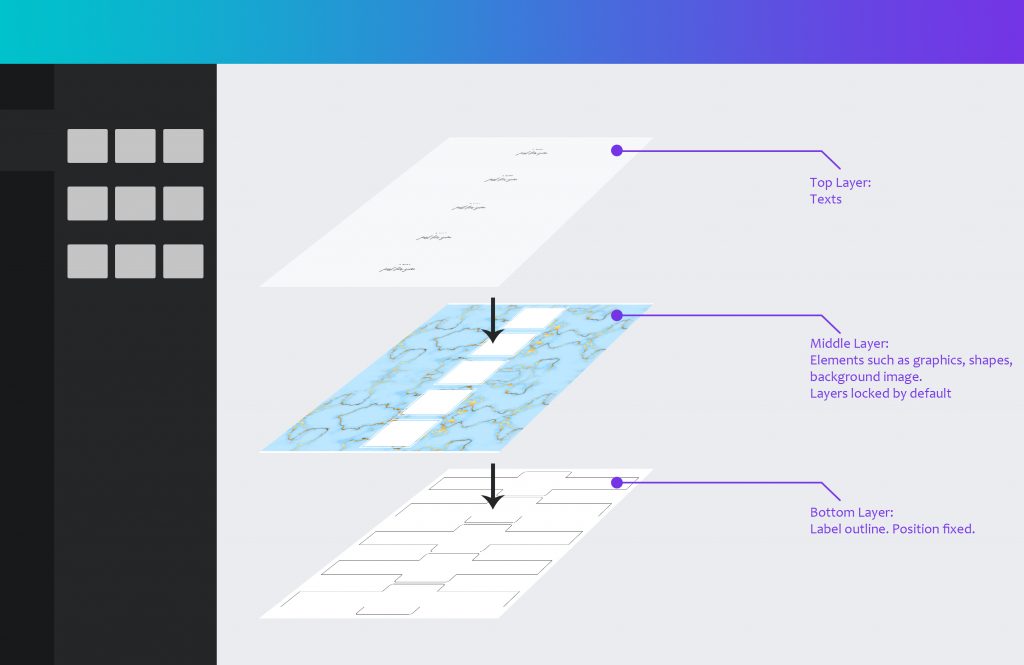
Top Layer
The top layer is the text layer. All the text can be revised directly.
Middle Layer
In this layer, there is the whole picture with the pattern or solid color as the background, or some elements such as graphics and shapes. The images in this layer are set to LOCKED by default, but you can UNLOCK them if you want to make a change to these designs.
Bottom Layer
The bottom layer is set as background layer, which is label’s outline, the position of the image is fixed.
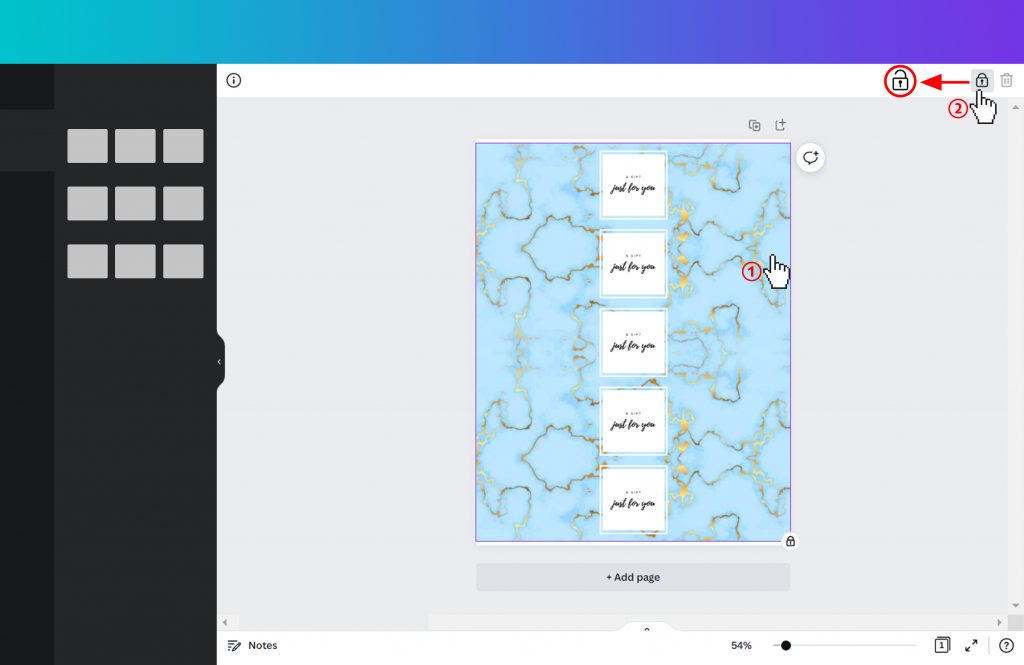
2. In the pre-design template, I need to change the position of some design, but I can’t see where is the label outline as there is whole image covered on it. What should I do?
Step 1. Click and choose background image (which is a whole picture with patterns or solid color),
Step 2. Unlock it by clicking “lock” button on the upper right.
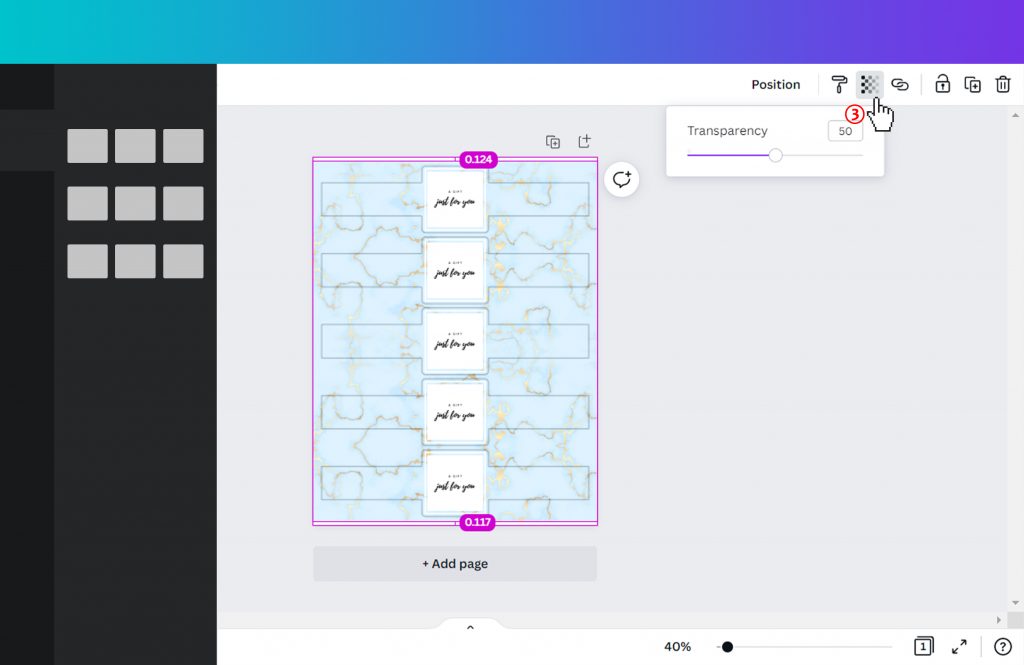
Step 3. Click “Transparency” button from upper right, turn down the transparency until the label outline is visible.
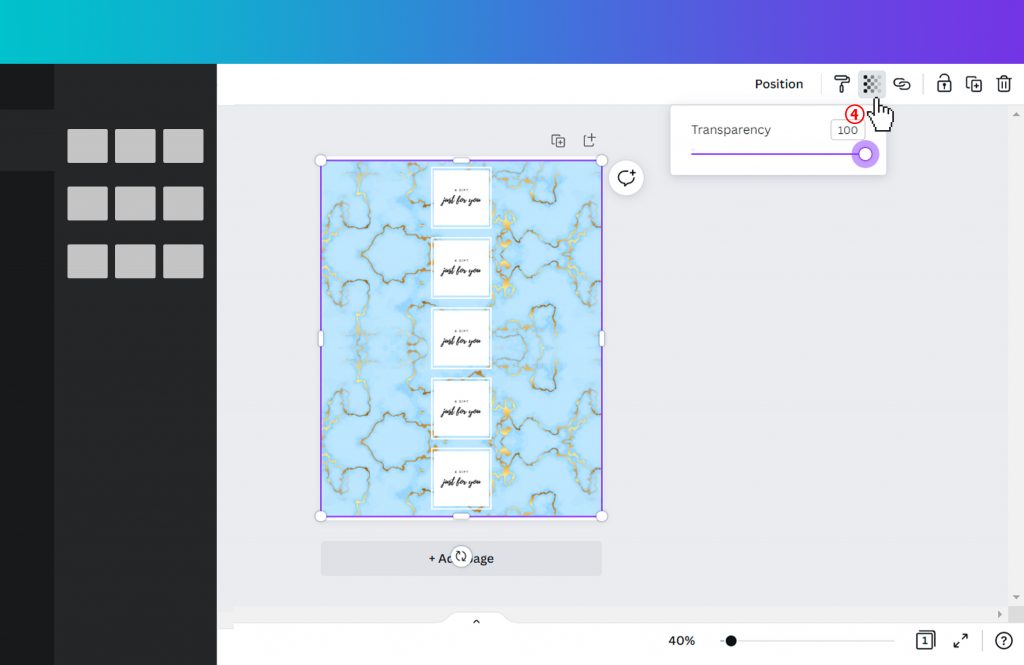
Step 4. Adjust your designs. When you finished the design, before saving and printing it, turn up the transparency of background image.
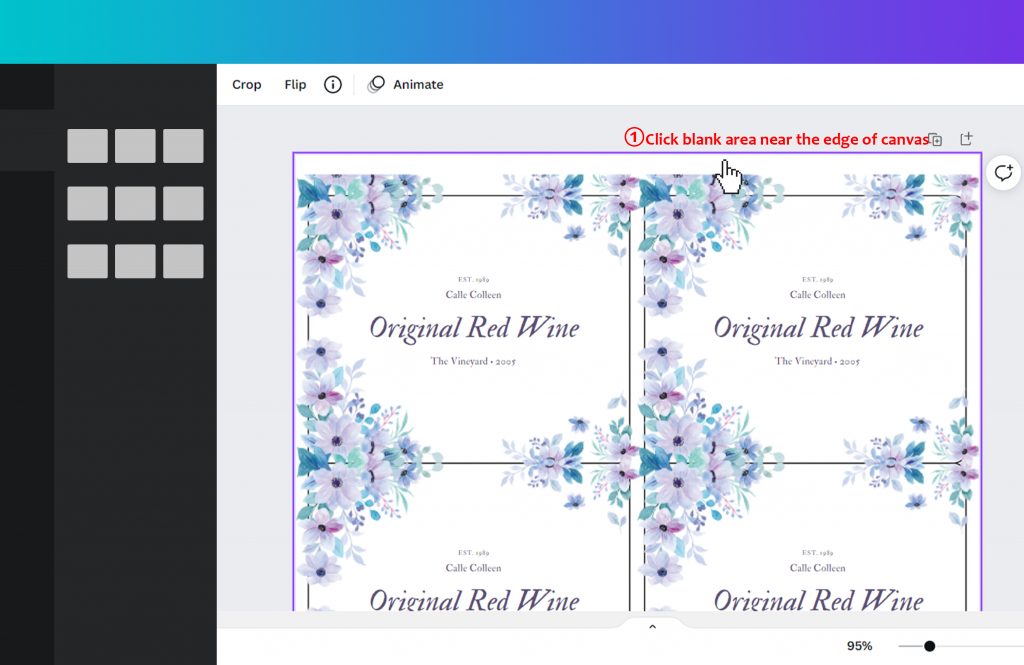
3. For those templates without a whole picture as background, I don’t want to print the black label border when printing. What should I do?
Step 1. When design is finished, click blank area near the edge of canvas.
Step 2. Click “Transparency” button from upper right, turn down transparency to “0”.
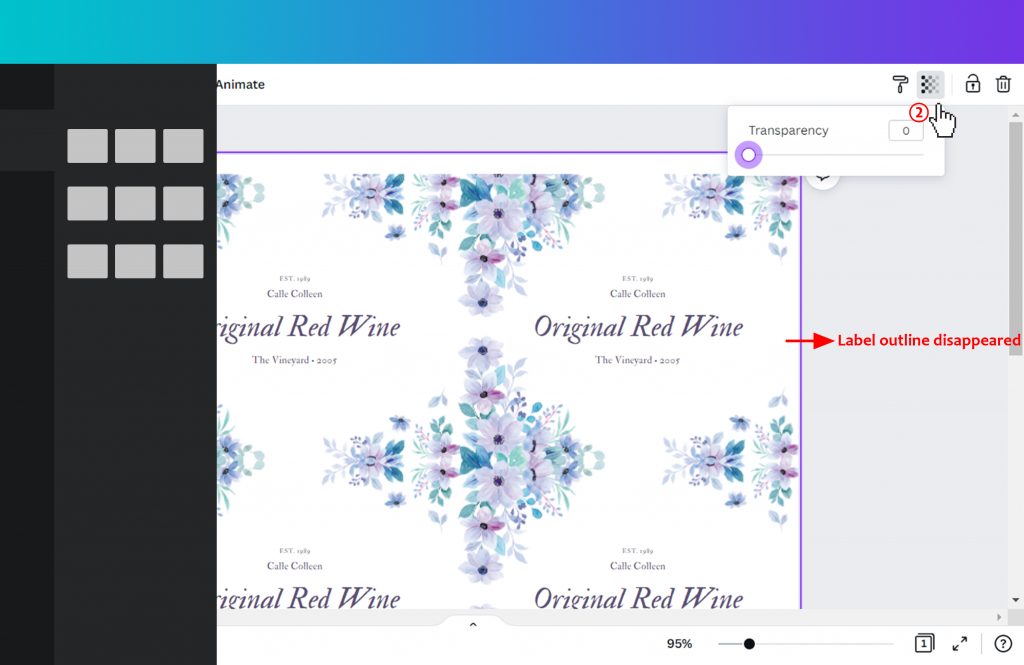
Step 3. Save and print, thus the label outline won’t be printed.