1 Getting Started
- Open the MS Word label template you downloaded from Mr-Label.com.
- For this project I’m using MR550 template.
- Delete the words in the template. <How to Delete Content in Bulk without Deleting the Background Border in MS Word Template?>
2 Design the First Label
- Enter text into the form.
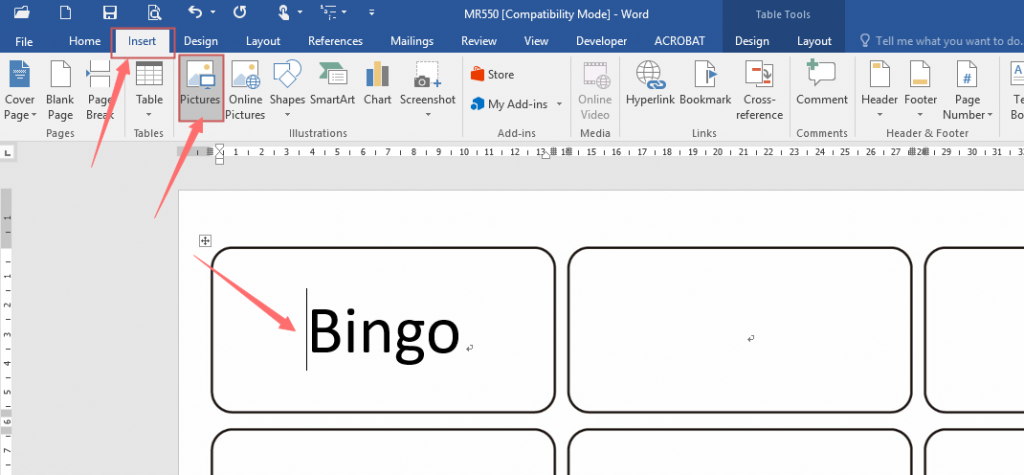
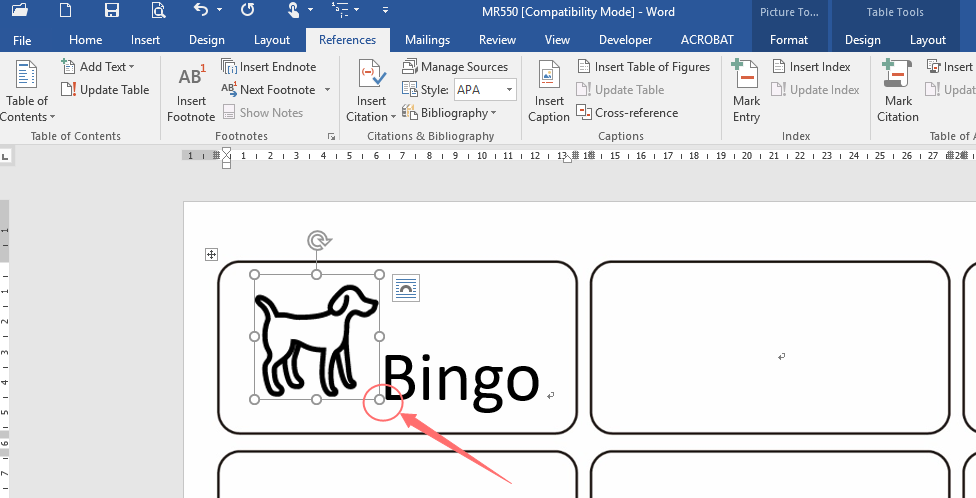
- Insert picture – click “Insert” > “Pictures”, select picture from the directory, click “Insert”, then the picture will be displayed in the label (Figure 2). At this point, you only need to move your mouse to the lower left corner of the image to resize the image (Figure 3).
- Attention: Laser and inkjet printers have an accuracy of approximately plus or minus 1mm in the vertical and in the horizontal, and the paper can also rotate slightly as it goes through the printer. You need to take this into account when you design your labels. If possible, avoid designing labels with a border around them because any inaccuracy will be visible.
3 Edit other labels
If all your labels contents are the same, you can select the content inside the first label (including text and images), then copy them to the remaining labels.
If your labels contents are stored in a spread sheet, please refer to the following article
<How to use data from an Excel worksheet to create labels in Word>
4 Print and enjoy!
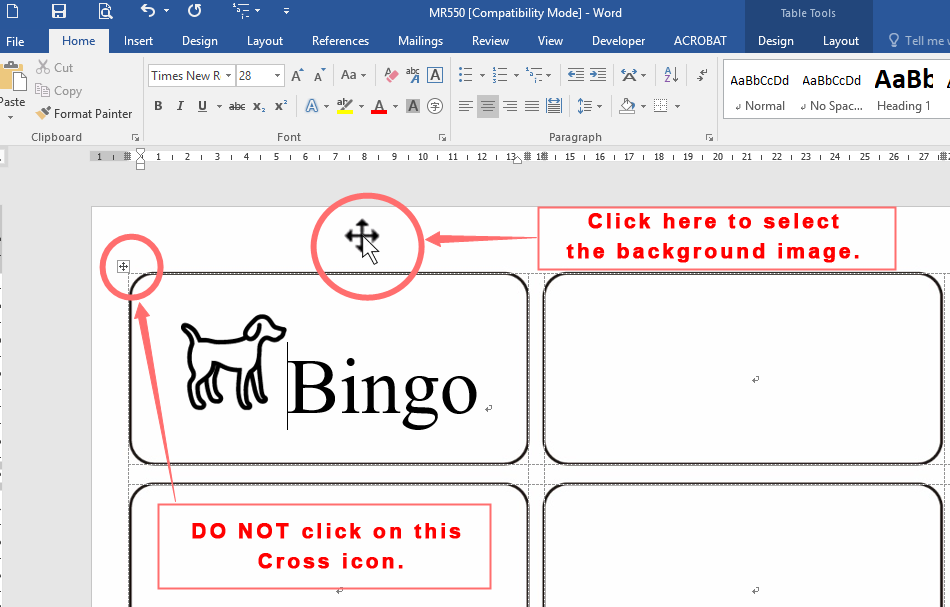
The border is inserted as a background image. You need to delete this image before printing.
Move the mouse to the upper left corner. When the “Cross” icon appears, click the mouse to select the background image, then click “Delete”, so that the printed label has no border.